Maps in Windows Phone 8 and Phone toolkit: a winning team – Part 2

In the last post we introduced the helpers that are available in the Phone toolkit for the Map control in Windows Phone 8: the map control is much more powerful than the one that is available in Windows Phone 7, but it lacks some controls that were widely used, like pushpins. In the previous post we’ve seen how to add a pushpin and place it in a specific position: it was an interesting experiment, but not really useful, because most of the times we need to place many pushpins on the same layer.

Let’s see how to do it using some features that every Windows Phone developer should know: template and binding.

Back to work

Let’s imagine that we’re going to display some restaurants that are near the user’s location. For this reason, the first thing we need is a class to map this information:

public class Restaurant
{
    public GeoCoordinate Coordinate { get; set; }
    public string Address { get; set; }
    public string Name { get; set; }
}

After that, we need a way to define a template to display a collection of Restaurant’s object over the map: we’re going to use one of the helpers available in the toolkit.

<maps:Map x:Name="myMap">
    <toolkit:MapExtensions.Children>
        <toolkit:MapItemsControl Name="RestaurantItems">
            <toolkit:MapItemsControl.ItemTemplate>
                <DataTemplate>
                    <toolkit:Pushpin GeoCoordinate="{Binding Coordinate}" Content="{Binding Name}" />
                </DataTemplate>
            </toolkit:MapItemsControl.ItemTemplate>
        </toolkit:MapItemsControl>
    </toolkit:MapExtensions.Children>
</maps:Map>

We use again the MapExtensions.Children that we’ve learned to use in the previous post. Then we introduce the MapItemsControl, which is a control that is able to display a collection of objects over the map. Think of it like a ListBox control, but in this case the elements that are part of the collection are displayed over the map, as a new layer. The most interesting feature of this control is that, like other controls that are used to display collections, it supports templating: we can define the template (the ItemTemplate property) of a single object, that will be used to render every object that is part of the collection. In this sample, we define as a template a Pushpin object, which Content and GeoCoordinate properties are in binding with the properties of the Restaurant class. This means that, in the code, we’re going to assign to the ItemSource property of the MapItemsControl a collection of restaurants: the control is going to render a Pushpin for every restaurant in the collection and will place it on the map, in the position defined by the GeoCoordinate property.

Here is how we do it:

public MainPage()
{
    InitializeComponent();
    Loaded+=MainPage_Loaded;
}

void MainPage_Loaded(object sender, RoutedEventArgs e)
{
    ObservableCollection<Restaurant> restaurants = new ObservableCollection<Restaurant>() 
    {
        new Restaurant { Coordinate = new GeoCoordinate(47.6050338745117, -122.334243774414), Address = "Ristorante 1" },
        new Restaurant() { Coordinate = new GeoCoordinate(47.6045697927475, -122.329885661602), Address = "Ristorante 2" },
        new Restaurant() { Coordinate = new GeoCoordinate(47.605712890625, -122.330268859863), Address = "Ristorante 3" },
        new Restaurant() { Coordinate = new GeoCoordinate(47.6015319824219, -122.335113525391), Address = "Ristorante 4" },
        new Restaurant() { Coordinate = new GeoCoordinate(47.6056594848633, -122.334243774414), Address = "Ristorante 5" }
    };

    ObservableCollection<DependencyObject> children = MapExtensions.GetChildren(myMap);
    var obj =
        children.FirstOrDefault(x => x.GetType() == typeof(MapItemsControl)) as MapItemsControl;

    obj.ItemsSource = restaurants;
    myMap.SetView(new GeoCoordinate(47.6050338745117, -122.334243774414), 16);
}

The first thing to highlight is that we’re going to use this code in the Loaded event of the page. This is required because, if we do it in the MainPage constructor, we risk that the code is executed before that every control in the page is rendered, so we may not have access yet to the MapItemsControl object.

First we create some fake restaurants to use for our test and we add it to a collection, which type is ObservableCollection<Restaurant>. Then we need to get a reference to the MapItemsControl object we’ve declared in the XAML, the one called RestaurantItems. Unlucky, due to the particular architecture of the MapExtensions helper provided with the toolkit, we can’t access to the control directly using the Name property, but we need to look for it in the collection of controls inside the Children property of the MapExtensions controls.

To do this, we use the MapExtensions.GetChildren method of the toolkit, passing as parameter our map control. This method returns an ObservableCollection<DependencyObject>, which is a collection of all the controls that have been added. In this case, by using a LINQ query and the GetType() method, we get a reference to the MapItemsControl object. We can use the FirstOrDefault statement because we’ve added just one MapItemsControl inside the MapExtensions.Children collection: once we have a reference, we cast it to the MapItemsControl (otherwise it would be a generic object, so we wouldn’t have access to the specific properties of the MapItemsControl class). Finally, we are able to access to the ItemsSource property, which holds the collection that is going to be displayed over the map using the ItemTemplate we’ve defined in the XAML: we simply assign to this property the fake ObservableCollection<Restaurant> we’ve created before.

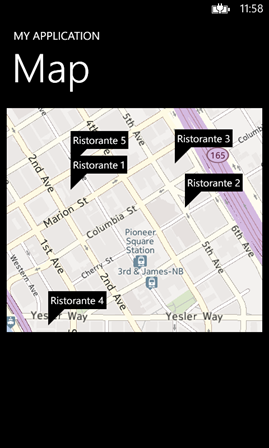
For sake of simplicity, we also set the center of the map to the coordinates of the first restaurant: this way will be easier for us to test the code and see if every pushpin is displayed correctly.

And here is the final result:

map

In the end

As you can see, the mechanism is very simple: it’s the usual one that we already use every time we have a collection that we wants to display. We define a collection of objects (usually a ObservableCollection<T>, to have INotifyPropertyChanged support out of the box), we define an ItemTemplate in the XAML and we assign the collection to the ItemsSource property of the control. The only trivial thing, in this case, is to get a reference to the MapItemsControl object, since it can’t be referenced just by using the name as for every other control.

Here is the link to download a sample that recap most of the things we’ve seen in the latest two posts:

Posted in Windows Phone | Tagged , | 36 Comments

Maps in Windows Phone 8 and Phone toolkit: a winning team – Part 1

Maps in Windows Phone 8 is probably the biggest evidence of the great partnership between Nokia and Microsoft: in Windows Phone 8 the maps application installed on every device, even the ones made by other manufacturers, is powered by Nokia technologies.

The most interesting news for developers is that also the Maps control has been updated and it introduced many improvements: first of all, performance improvements. Bing Maps control wasn’t good in this and, especially if you tried to add layers or pushpin, you could have experienced really poor performances.

Second, the new control now offers lot of new options: you can enable 3D landmarks, you can switch between day and night colors, you can change the heading and the pitch, you can easily calculate routes and so on.

Adding the map control is very easy: in the XAML you need to add a reference to the Microsoft.Phone.Maps namespace:

xmlns:maps=”clr-namespace:Microsoft.Phone.Maps.Controls;assembly=Microsoft.Phone.Maps”

After that you can insert the Map control simply by declaring it in the XAML:

<maps:Map
    x:Name="myMap"
    Center="30.712474,-132.32691"
    ZoomLevel="17"
    Heading="45"
    Pitch="25"
    CartographicMode="Road"
    ColorMode="Dark"
    PedestrianFeaturesEnabled="True"
    LandmarksEnabled="True"
    />

In this sample you can see an example of many of the properties that are available in the control:

  • Center is the location where the map is centered. It accepts a GeoCoordinate object, which is a complex object that store many geo location properties, like latitude, longitude, altitude and so on.
  • ZoomLevel is the zoom level of the map, from 1 (very far) to 20 (very near).
  • Heading is the rotation of the map.
  • Pitch is the elevation of the map compared to the horizon.
  • CartographicMode is the type of map that is displayed, you can choose between Aerial, Road, Terrain or Hybrid.
  • ColoreMode can be used to improve the readability of the map during night (Dark) and day (Light).
  • LandmarksEnabled can be used to turn on the 3D representation of some important builidings in the map (like monuments, churches and so on).
  • PedestrianFeaturesEnabled can be used to turn elements that are useful for people that is using the map during a walking (like stairs).

One of the coolest feature is that, with the new map control, is really easy to add a layer, that is a collection of elements that are displayed over the map, as you can see in this sample:

private void OnAddShapeClicked(object sender, RoutedEventArgs e)
{
    MapOverlay overlay = new MapOverlay
                             {
                                 GeoCoordinate = myMap.Center,
                                 Content = new Ellipse
                                               {
                                                   Fill = new SolidColorBrush(Colors.Red),
                                                   Width = 40,
                                                   Height = 40
                                               }
                             };
    MapLayer layer = new MapLayer();
    layer.Add(overlay);

    myMap.Layers.Add(layer);
}


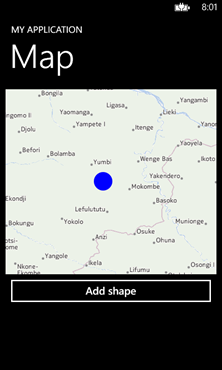
For every element I want to display on the map I create a MapOverlay object, that has two main properties: GeoCoordinate, with the coordinates where the element should be placed, and Content, which is a generic object property so it accepts any XAML control. In this example, I’m creating a blue circle, using the Ellipse control, that will be placed in the same position where the map is centered.

In the end I simply create a MapLayer and I add to it the MapOverlay object I’ve just created: I could have created many more MapOverlay object and added them to the same MapLayer (or also to a new one). The last step is to add the layer to the map, by simply adding it to the Layers collection, which is a property of the Map control.

Here is the final result:

shape

This feature is very powerful: since the MapOverlay object has a generic Content property, you can customize the overlay elements any way you want. But there’s a downside: there’s nothing ready to be used in the SDK for common scenarios like displaying a pushpin or the user’s location.

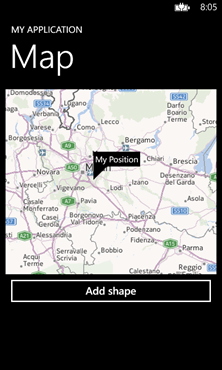
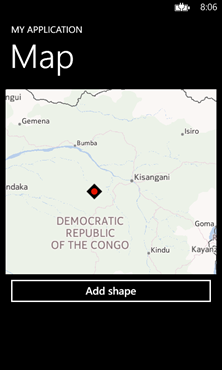
So please say hello to the Phone Toolkit, that probably you already know since it’s one of the essentials toolkits for every Windows Phone developers, since it contains many useful controls, helpers and converters that are not available in the SDK, even some of the standard ones that are used in the native application. The Phone Toolkit is available on Codeplex, but the easiest way to add it to your project is using NuGet. In the latest release Microsoft has added, other than some new cool controls and transitions effects, some map utilities. In our scenario we can make use of two nice controls: UserLocationMarker and Pushpin. They both work in the same way: they are overlay elements that are placed on the map over a specific position and they offer a way to interact with them (so that, for example, the user can tap on a pushpin and do something). They only look different: the Pushpin (in the left image) has the same look & feel of the ones that were available in the old Bing Maps and can be used to highlights point of interests in the map; UserLocationMarker (in the right image) is used to identify the position of the user and it has the same look & feel of the one used in the native app.

pushpinuser

How to use pushpins

First let’s see the simplest way to add a single Pushpin or a UserLocationMarker to the map. First you have to declare in the XAML the following namespace:

xmlns:toolkit=”clr-namespace:Microsoft.Phone.Maps.Toolkit;assembly=Microsoft.Phone.Controls.Toolkit”

Then here is a sample XAML:

<maps:Map x:Name="myMap">
    <toolkit:MapExtensions.Children>
        <toolkit:UserLocationMarker x:Name="UserLocationMarker" />
        <toolkit:Pushpin x:Name="MyPushpin" Content="My Position"></toolkit:Pushpin>
    </toolkit:MapExtensions.Children>
</maps:Map>

The first thing is to use the MapExtensions, one of the extensions available in the toolkit. This extension has a Children property, that is the collection of the elements that are displayed over the map. In this code you can see an example of both controls: UserLocationMarker and Pushpin. The only difference is that, for the pushpin, I’ve set the Content property, which is the label displayed on the mark.

If we want to manage them in the code, in order to set the position in the map, we can use the following code:

UserLocationMarker marker = (UserLocationMarker)this.FindName("UserLocationMarker");
marker.GeoCoordinate = myMap.Center;

Pushpin pushpin = (Pushpin)this.FindName("MyPushpin");
pushpin.GeoCoordinate = new GeoCoordinate(30.712474, -132.32691);

First we retrieve the control by using the FindName method and passing as parameter the value of the x:Name property of the control. Then, once we have a reference, we change the value of the GeoCoordinate property. Both controls also have a Tap event, that is triggered when user taps on the pushpin. We can use it to interact with the user, like in the following example:

<maps:Map x:Name="myMap" Height="400">
    <toolkit:MapExtensions.Children>
        <toolkit:Pushpin x:Name="MyPushpin" Content="My Position" Tap="MyPushpin_OnTap" />
    </toolkit:MapExtensions.Children>
</maps:Map>
private void MyPushpin_OnTap(object sender, GestureEventArgs e)
{
    Pushpin pushpin = sender as Pushpin;
    MessageBox.Show(pushpin.Content.ToString());
}

In the XAML we have declared an event handler to manage the Tap event; in the code we get the pushpin that has been tapped (using the sender object that is passed as parameter) and we show the label on the screen using a MessageBox.

A useful converter

If you’ve already played with the geo localization services available in the new Windows Runtime APIs (the same that are available in Windows 8), you should have noticed a weird thing: the class used by the geo localization APIs to store location information is called Geolocalization, while the one used by the map is called GeoLocalization. Unlucky, it’s not a typo, they are two different classes: the result is that you can’t take the information returned by the geo localization APIs and assign it to the map, but you need a conversion. Luckily, the Phone Toolkit contains an extension method to do that, you simply have to add the Microsoft.Phone.Maps.Toolkit to the code and than you can do something like this:

Geolocator geolocator = new Geolocator();
Geoposition geoposition = await geolocator.GetGeopositionAsync();
myMap.Center = geoposition.Coordinate.ToGeoCoordinate();

The ToGeoCoordinate() extension method takes care of converting the Coordinate object returned by the Geolocator class (which type is Geocoordinate) in the correct one required by the map control.

In the next post

In this post we’ve covered some basic scenarios: they are useful to understand how the phone toolkit can be helpful in developing an application that uses maps, but they are not so useful in a real scenario. For example, a real application would have displayed more than one pushpin in the map, in order to display, for example, some point of interests around the user, like restaurants or pubs. In the next post we’ll see how to do that using some concepts every Windows Phone developer should be familiar with: templates and binding.

Posted in Windows Phone | Tagged , , | 18 Comments

Microsoft MVP for the third year!

The 2012 has been a strange year. From outside, you could have told that it’s been a bad year: due to a serious health problem (that, luckily, now has been solved) I had to face 2 surgeries and to spend 8 months without being able to walk, since one foot was “out of order”. But, if I analyize everthing that happened in 2012, I can’t tell that it’s been a bad year: my family helped me a lot to go through my situation.

It’s been a great year also from the professional point of view: I’ve started a new job in Funambol, where I’m able to work with the technologies I love most; I’ve started to work on my first Italian book that should be ready in the next months; in October I’ve been nominated Nokia Developer Champion; I’ve started my worldwide experience by opening this blog. And by the way, luckily I’m a developer, so being not able to walk didn’t stop me to work or to continue supporting communities: it’s been an intense year, due to the release of Windows 8 and Windows Phone 8, and I had the chance to meet a lot of great people, to write a lot of articles and to speak at many conferences.

But, in the end, I can’t hide that the MVP award is one of the things I’m most proud of: not only because it gives me even more chances to express my passion about development and communities, but especially because I really consider it a big family. I met a lot of amazing people, not only from a professional point of view; some of them have become important friends to me.

This is why I’m so happy to announce that, for the third year, I’ve been renewed as MVP in the Windows Phone Development category. There are many people to thanks for this: first, my wife Angela, that always supports me even when I had to steal time from us to work on my activities; my great friend Ugo, which introduced me in this world for the first time and helped me (and he’s still helping) a lot to move my first steps; the Microsoft DPE department, especially Lorenzo, that often involved me in their activities; Alessandro Teglia, the best MVP lead in the world; and, in the end, Roberto and the DotNetLombardia friends, which believed in me since the first time and allowed me to move the first steps in the communities world.

And now? The 2013 seems to be very intense from the beginning: with the DotNetLombardia’s friends we’re organizing a big Windows Phone event for the end of January; in February I will attend to the MVP Summit in Seattle and, the week after, I will speak at Community Days, the biggest Italian community event.

With the hope that I’ll always be able to repay to the communities all the support and friendship they have always gifted to me.

Posted in Developer's life | Tagged , | 1 Comment

Working with SQLite in Windows Phone 8: a sqlite-net version for mobile

With a perfect timing, as soon as I’ve published my previous post about using the chsarp-sqlite engine in combination with sqlite-net, Peter Huene has released a porting of the famous library for Windows Phone 8. What does it mean? That, finally, we are able to use the native SQLite engine that has been released as a Visual Studio extension and that we can use a common library to share our data layer with a Windows Store app for Windows 8.

At the moment, the project isn’t available on NuGet yet and requires two steps: the first one is to add a native class, that acts as a wrapper for the functions used by sqlite-net, and the second is to download a specific sqlite-net version, where the developer has replaced the usage of the csharp-sqlite engine with the native one.

Let’s start!

Please welcome GitHub

Both projects are hosted on GitHub (a popular website to host open source projects that also acts as a source control system based on Git), so the best way to download and use both them is using Git: you can also download the project in a single zip file but, this way, every time the developer will change something you’ll have to download everything again and add the new project to your solution. If you’re not familiar with Git, the easiest way to use it is to download GitHub for Windows, which is a Windows client that is able to connect to repositories hosted on GitHub and to keep files in sync with the server.

Just download and install the application from here: after you’ve launched it you’ll have to configure it for the first time. You’ll need to have a valid GitHub account: if you don’t have it, simply go to the website and create one. Once you’ve done you should see a window like this:

image


Unless you’ve already used GitHub and you already own one or more repositories, the window will be empty. Now go to the GitHub website and, specifically, to the sqlite-net-wp8 repository, that is available at the URL https://github.com/peterhuene/sqlite-net-wp8. At the top of the page, in the toolbar, you’ll find a button labeled Clone in Windows. Click on it and make sure that you’ve logged in in the website with the same credentials you used for the application, otherwise you’ll be redirected to the page to download the GitHub client.

image

Once you’ve done it the GitHub client will be opened and the repository will be automatically added to the local repositories list: after a while (the progress bar will show you the status of the operation) the whole repository will be downloaded in the default location, that is the folder C:\Users\User\Documents\GitHub\ (where User is your Windows username). Inside it you’ll find a folder called sqlite-net-wp8: that is the project that we need to add to our solution.

Since we’re already playing with GitHub, let’s download also the sqlite-net fork adapted to work with Windows Phone 8: repeat the operations we’ve just made on the repository available at the URL https://github.com/peterhuene/sqlite-net.

The last thing to do is to make sure you’ve installed the SQLite for Windows Phone extension, that is available from the Visual Studio Gallery.

Now that we have everything we need, we can start working on our Windows Phone 8 project.

Let’s play with SQLite

The first thing to do is to open Visual Studio 2012 and to create a Windows Phone 8 application. Once you have it, it’s time to add to the solution the sqlite-net-wp8 project we’ve downloaded from GitHub: simply right click on the solution, choose Add existing project and look for the file Sqlite.vcxproj in the sqlite-net-wp8 folder (that should be C:\Users\User\Documents\GitHub\sqlite-net-wp8). You’ll see the new project added in the Solution Explorer: it will have a different icon than the Windows Phone project, since it’s written in native code and not in C#.

image

As I’ve previously explained, this is just the native wrapper for some of the functions used by sqlite-net: now we need to add the real sqlite-net and we do that by simply copying the Sqlite.cs and SqliteAsync.cs files that are stored inside the src folder of the solution (that will be available, as for the other one, in the C:\Usesr\User\Documents\GitHub folder) into our project. We can do that by simply right clicking on the Windows Phone project and choosing Add existing item.

Now we need to add a reference in our Windows Phone application both to the sqlite-net-wp8 library and to the SQLite engine: right click on your project, choose Add reference and, in the Solution tab, look for the sqlite library; after that, look for the SQLite for Windows Phone library, that is available in the Windows PhoneExtensions section.

UPDATE: the developer, to keep supporting also the C# engine I’ve talked about in my previous post, has recently added a new requirement to use his library; you’ll have to add a specific contitional build symbol, in order to properly use the native engine. To do that, right click on your project (the one that contains the Sqlite.cs and SqliteAsync.cs files you’ve previously added), choose Properties, click on the Build tab and, in the Conditional compilation symbols textbox add at the end the following symbol: USE_WP8_NATIVE_SQLITE. In a standard Windows Phone 8 project, you should have something like this:

SILVERLIGHT;WINDOWS_PHONE;USE_WP8_NATIVE_SQLITE

And now? Now we can simply copy and paste the code we’ve already seen in the original post about Windows 8 or in the more recent post about csharp-sqlite: since all these libraries are based on sqlite-net, the code needed to interact with the database and to create or read data will be exactly the same. Here are the usual examples I make about doing common operations:

UPDATE: as some readers have pointed out in the comments, with the previous code eveyrthing was working fine, but the database file was missing in the local storage. As the sqlite-net-wp8 developer pointed me out, there’s a difference between the Windows 8 and the Windows Phone version of the library. In Windows 8 you don’t have to set the path, it’s automatically created in the root of the local storage, unless you specify differently. In Windows Phone 8, instead, you have to pass the full path of the local storage where you want to create the databse: the code below has been updated to reflect this change.


//create the database
private async void CreateDatabase()
{
    SQLiteAsyncConnection conn = new SQLiteAsyncConnection(Path.Combine(ApplicationData.Current.LocalFolder.Path, "people.db"), true);
    await conn.CreateTableAsync<Person>();
}

//insert some data
private async void Button_Click_1(object sender, RoutedEventArgs e)
{
    SQLiteAsyncConnection conn = new SQLiteAsyncConnection(Path.Combine(ApplicationData.Current.LocalFolder.Path, "people.db"), true);

    Person person = new Person
    {
        Name = "Matteo",
        Surname = "Pagani"
    };

    await conn.InsertAsync(person);
}

//read the data
private async void Button_Click_2(object sender, RoutedEventArgs e)
{
    SQLiteAsyncConnection conn = new SQLiteAsyncConnection(Path.Combine(ApplicationData.Current.LocalFolder.Path, "people.db"), true);

    var query = conn.Table<Person>().Where(x => x.Name == "Matteo");
    var result = await query.ToListAsync();
    foreach (var item in result)
    {
        Debug.WriteLine(string.Format("{0}: {1} {2}", item.Id, item.Name, item.Surname));
    }
}

Be careful!

There are some things to keep in mind when you work with this library and SQLite. The first one is that, actually, both libraries are not available on NuGet: you’ll have to keep them updated by using GitHub for Windows and, from time to time, by syncing the repositories, in order to have your local copy updated with the changes. If you’re going to add the sqlite-net-wp8 project to the solution, like I did in the post, you won’t have to do anything, you’ll just have to rebuild your project. In case of the sqlite-net fork, instead, since we’ve simply copied the files, you’ll need to overwrite the old ones with new ones, in case they are updated. Or, even better, you can add the two files as a link from the original project: this way you’ll simply have to update the libraries from GitHub to see the updates in your application.

The second important thing to consider is that the sqlite-net-wp8 library is built against a specific SQLite version: if the SQLite team releases an update to the Visual Studio extension (so that Visual Studio is going to prompt you that there’s an update to install), don’t update it until the sqlite-net-wp8 project has been updated. Otherwise, many references will be missing and you won’t be able to open the project at all.

Have fun!

Posted in Windows Phone | Tagged , | 133 Comments

A workaround to use SQLite in a Windows Phone 8 application

Recently I’ve made a post where I’ve tried to explain better the SQL Lite support situation on Windows Phone 8. The core of the post was very simple: the SQLite engine is available for Windows Phone 8, but actually a library to manipulate data using a high level language like C# or VB.NET is missing.

One of the workarounds I’ve talked about was using csharp-sqlite, an open source project hosted on Google Code that embeds the SQLite engine into a C# library, so that it can be used also by applications based on the .NET framework. This project also features a client library, that can be used to manipulate the database: there’s also a Windows Phone porting of the library, but you can’t share it with a Windows 8 project due to the lack of support to the .NET framework.

Luckily, there’s still a solution to share your data layer with a Windows 8 application: by using sqlite-net. I’ve already talked about this library in a previous post and this is, probably, the most famous wrapper for the native SQLite engine. The good news is that sqlite-net supports two different SQLite engines, according to the platform: the native one on Windows 8 and the csharp-sqlite one on Windows Phone 7 or 8. The result is that that you’ll be able to use the sqlite-net classes and methods on both platforms and share the code between them: according to the platform, the proper SQLite engine will be used. Is there a downside? Yes, csharp-sqlite is a porting and is not managed directly by the SQLite team. This means that every time the SQLite team releases an update of the engine the C# engine should be recompiled against the new one. Plus, it seems that the project has been abandoned: the latest version has been released on 26th August 2011, so it’s a little bit old. This means that you’re going to miss all the improvements that the SQLite team has made in the last year.

But, since there are no other options at the moment, it worth a try to take a closer look to this option, especially if you just have to store some data and you don’t have a complex database to manage.

Grabbing the engine

The first thing to do is to go the Download page of the csharp-sqlite project and download the latest available version, that is the 3.7.7.1.71. There isn’t a binary version or a package on NuGet: you’ll have to manually open the solution file Community.CsharpSqlite.SQLiteClient.WP.sln inside the Community.CsharpSqlite.SQLiteClient.WP folder. Visual Studio 2012 will update some files of the solutions, since it has been created using Visual Studio 2010. Now build the solution: you may get some compilation errors, in this case try to build just the Community.CsharpSqlite.WinPhone project; in fact, the build errors are just caused by some unit tests that are not using valid code.

Once you’ve done that, open the project’s folder and grab the Community.CsharpSqlite.WinPhone.dll file from the bin/Debug folder: it’s the reference you’ll need to add to your Windows Phone 8 project, so go and create a new one using the basic Windows Phone application template and choose Windows Phone OS 8.0 as target OS. Now you’ll need to add a reference to the library we’ve copied before, by right clicking on the project and choosing Add reference. After you’ve done that, it’s time to install sqlite-net by using NuGet: right click again on the project, choose Manage NuGet packages, look for and install the package called sqlite-net.

Playing with SQLite

Once you’ve done, you’ll find some new files in your project: open the SQLite.cs file; you’ll see, right at the top, what I was talking about at the beginning at the post.

#if WINDOWS_PHONE
    #define USE_CSHARP_SQLITE
#endif

#if USE_CSHARP_SQLITE
    using Community.CsharpSqlite;
    using Sqlite3DatabaseHandle = Community.CsharpSqlite.Sqlite3.sqlite3;
    using Sqlite3Statement = Community.CsharpSqlite.Sqlite3.Vdbe;
#else
    using Sqlite3DatabaseHandle = System.IntPtr;
    using Sqlite3Statement = System.IntPtr;
#endif

As you can see, by using conditional compilation instructions, sqlite-net will define and activate the symbol USE_CSHARP_SQLITE in case the app is running on Windows Phone. This symbol will be used across the library to wrap the different behaviors to the standard sqlite-net methods and classes: this way, you’ll be able to use the same code to read and write data to the database, regardless of the platform.

And now what? You can copy and paste the same code I’ve explained in this post: since the library is the same, you’ll be able to use the same approach to work with the data. For example, you can do something like this to create the database and a table to store a Person entity:

private async void CreateDatabase()
{
    SQLiteAsyncConnection conn = new SQLiteAsyncConnection("people");
    await conn.CreateTableAsync();
}

After that, you can insert some data in the database:

private async void Button_Click_1(object sender, RoutedEventArgs e)
{
    SQLiteAsyncConnection conn = new SQLiteAsyncConnection("people");

    Person person = new Person
    {
        Name = "Matteo",
        Surname = "Pagani"
    };

    await conn.InsertAsync(person);
}

or read the same data and write it into the Output Window:

private async void Button_Click_2(object sender, RoutedEventArgs e)
{
    SQLiteAsyncConnection conn = new SQLiteAsyncConnection("people");

    var query = conn.Table().Where(x => x.Name == "Matteo");
    var result = await query.ToListAsync();
    foreach (var item in result)
    {
        Debug.WriteLine(string.Format("{0}: {1} {2}", item.Id, item.Name, item.Surname));
    }
}

If I would have isolated the code to interact with the database in another class (for example, a service class) I would have been able to use it both in a Windows 8 and a Windows Phone 8 application, without changing it: sqlite-net would have done all the dirty work of using the correct engine for me.

Conclusion

In this post we’ve seen a way to interact with a SQLite database and share the code between Windows Phone and Windows 8. It’s not the best approach, because it’s forcing us to use an unofficial porting of SQLite, that isn’t updated since more than a year. But, if you don’t have a complex scenario and you need to start working on your application as soon as possible and you need to share code with Windows 8 (so SQL CE it’s not a solution), it can be an acceptable approach. Obviously, the best solution would be to have a native sqlite-net implementation also for Windows Phone 8, in order to use the native SQLite engine that is already available in Windows Phone 8. It will come… eventually, one day or the other Smile

Posted in Windows Phone | Tagged , | 3 Comments